Category: Painting

  • How to Paint the Whole House Exterior

    How to Paint the Whole House Exterior

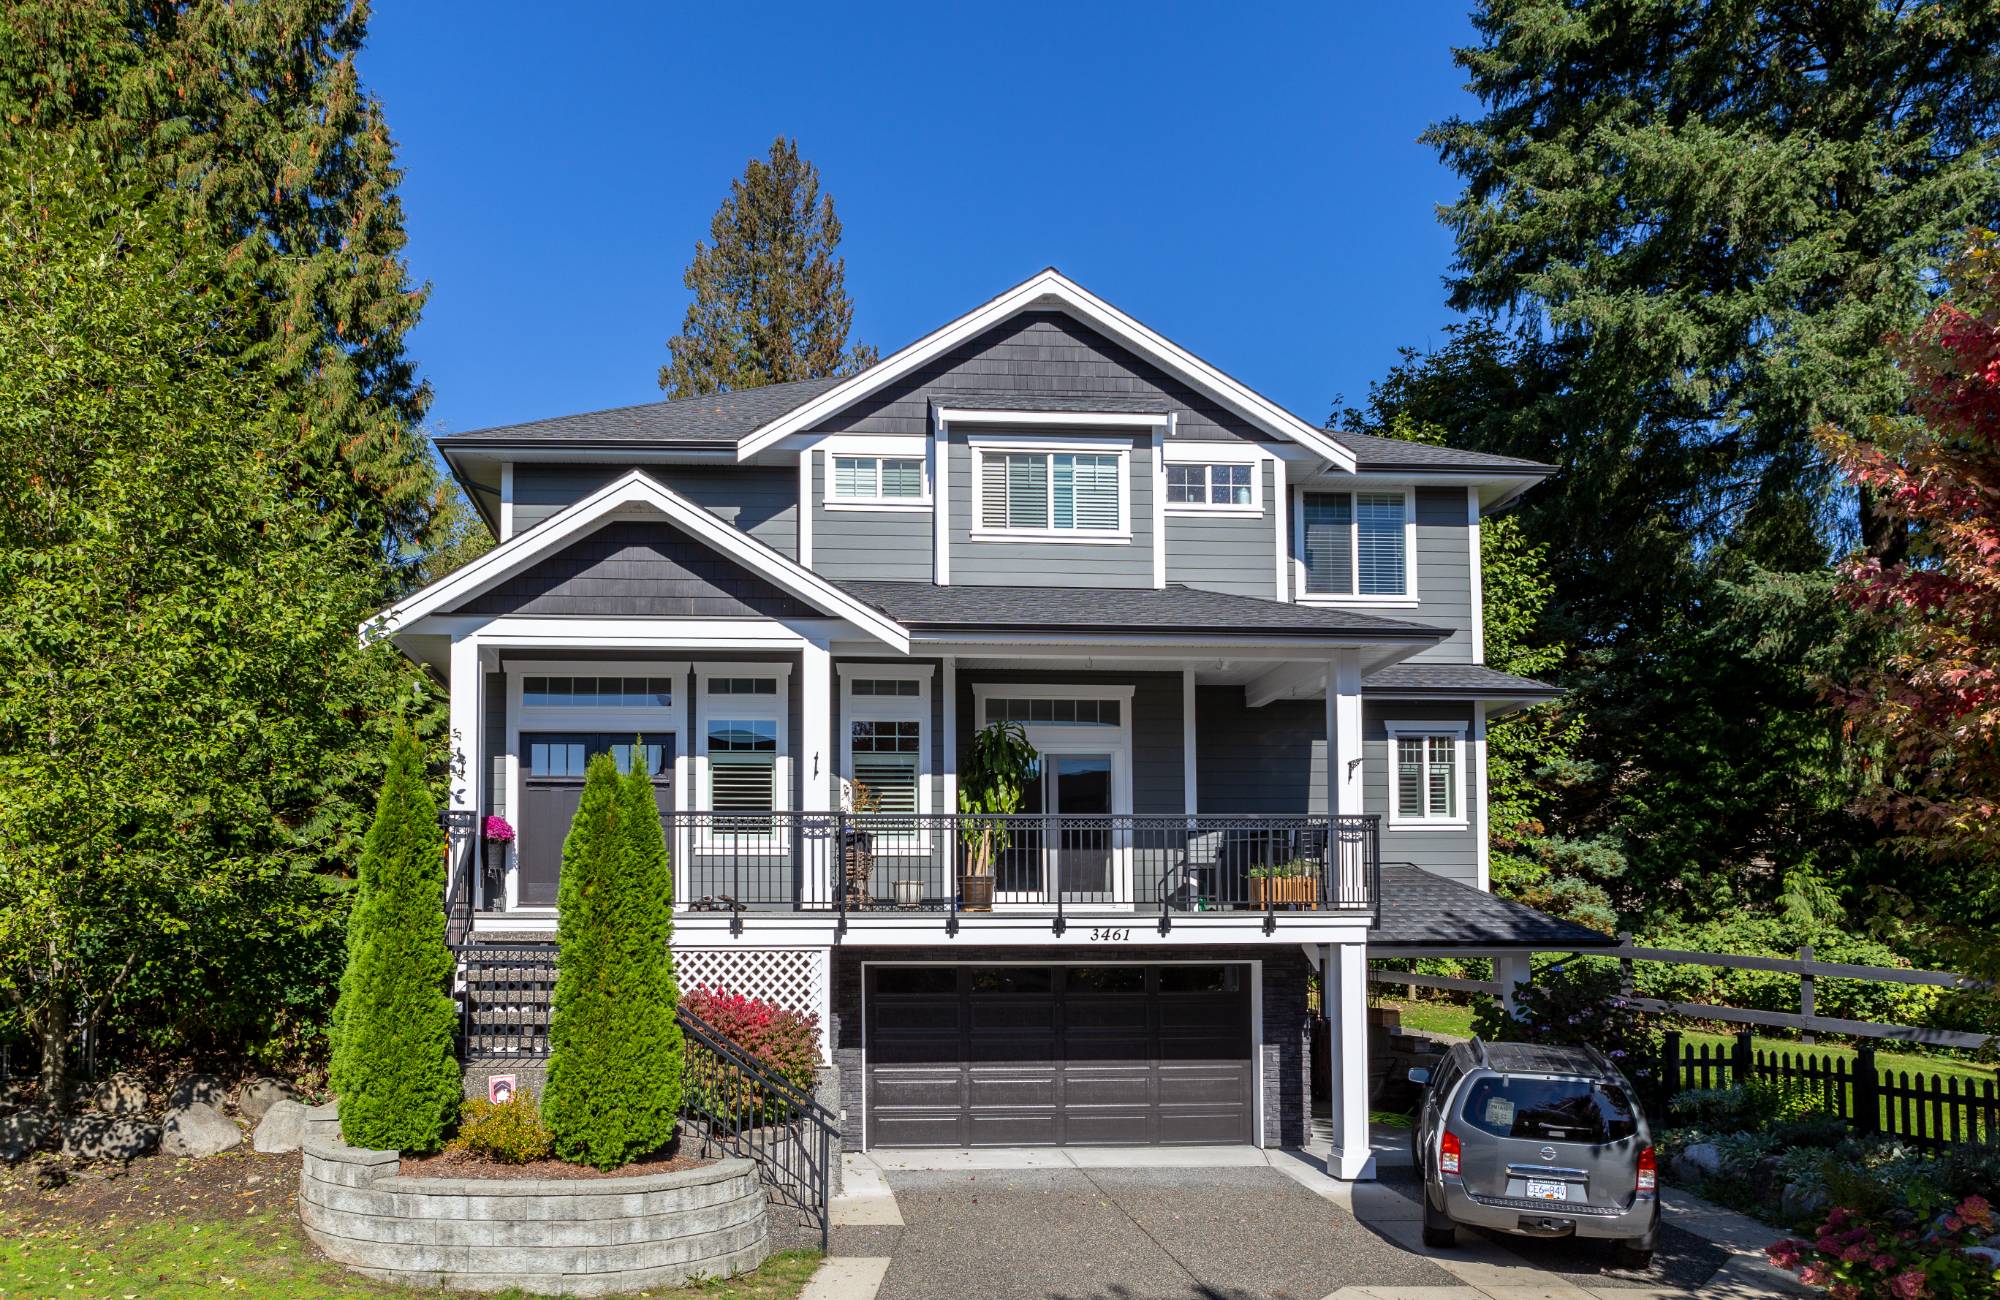
    Refreshing the exterior of a home with a new coat of paint is one of the most effective ways to enhance both appearance and protection. Exterior paint not only boosts curb appeal but also shields the property against harsh weather conditions, UV exposure, and general wear over time. For homeowners considering this significant project, understanding the process is essential.

    Planning and Preparation

    Before painting begins, a clear plan should be in place. Selecting colours that complement the home’s architectural style and surrounding environment is an important first step. Timing is equally critical; mild, dry conditions are most suitable for exterior painting.

    Preparation of the surfaces is vital for a durable result. The exterior should be thoroughly cleaned to remove dirt, mould, and peeling paint. Any cracks or damaged areas must be repaired and allowed to dry. Proper surface preparation ensures that the paint adheres effectively and maintains its finish for years to come.

    Protecting the Surroundings

    Exterior painting can be disruptive if protective measures are overlooked. Drop cloths, masking tape, and plastic sheeting are used to safeguard windows, doors, garden beds, and driveways. Removing items such as shutters, light fixtures, and outdoor fittings also helps achieve a cleaner, more precise finish.

    Priming the Surface

    A primer acts as the foundation for exterior paint. It improves adhesion, covers imperfections, and creates an even base for colour application. On bare timber, patched surfaces, or heavily weathered areas, primer is particularly important to ensure durability.

    Application and Technique

    The tools and techniques selected influence the quality of the finish. Brushes are ideal for edges and intricate details, rollers cover flat areas efficiently, and paint sprayers are suitable for larger surfaces. The recommended approach is to start at the top of the structure and work downward to prevent streaking.

    At least two coats of high-quality exterior paint should be applied, with adequate drying time between coats. This process creates a stronger barrier against the elements and enhances the overall visual appeal of the property.

    Detailing and Final Touches

    Details such as trims, eaves, and doors contribute significantly to the character of the home. Using complementary or contrasting colours in these areas highlights architectural features and elevates the overall look. Once the painting is complete, drop cloths can be removed, fixtures replaced, and a final inspection carried out to identify any missed spots.

    DIY vs. Professional Support

    While some homeowners may choose to undertake the project themselves, painting an entire house exterior is physically demanding and requires specialised equipment. For many, hiring a painter offers a safer and more efficient alternative. Engaging a professional painting company ensures that the project is completed to a high standard, with durable results that add long-term value to the property.

    Conclusion

    Painting the exterior of a house is a substantial undertaking that combines preparation, skill, and attention to detail. When executed correctly, it enhances curb appeal, protects the home, and provides lasting satisfaction. Whether approached as a carefully planned DIY project or entrusted to professionals, exterior painting remains one of the most impactful improvements a homeowner can make.

  • Mixing White and Stained Trim: A Timeless Interior Design Trend

    Mixing White and Stained Trim: A Timeless Interior Design Trend

    Mixing white and stained trim is a perfect way to add contrast and sophistication to your interior design. This trend allows you to update your space without the need for a full paint job. If you have a home filled with natural light, it’s easy to overlook the details. However, outdated trim and wallpaper can detract from your home’s beauty. By refreshing these elements, you can breathe new life into your space.

    Restoring faded trim and walls is a simple process that requires basic tools, patience, and knowledge. Once you understand how it all comes together, achieving a perfect finish is straightforward. You can mix wood and white trim paint, but the opacity of the paint may affect the final result. It’s also possible to mix stained and painted trim, offering you flexibility in your design choices.

    There are several reasons why you might choose to mix white and wood trims. Firstly, it allows you to customize the color of your wood trim to suit your home’s decor. Additionally, different types of wood trim offer varying natural hues, adding depth and warmth to your space. Mixing wood and white trim can also create a more elegant look, enhancing the overall appearance of your home.

    To mix wood and white trim effectively, start by selecting the right stain color for your trim. Then, mix the white trim paint with water and apply thin coats to the stained surface. This process will ensure a crisp finish without brush marks or drips. You can also have white trim with wood doors, as long as you properly prepare the surface and use a sealer to prevent discoloration.

    Maintaining your newly painted trim is essential for keeping it looking its best. Consider applying an oil-based enamel stain every six months to maintain its appearance. Ultimately, the choice of trim color is up to you. Whether you prefer a seamless look or want to mix and match colors, you can create a beautiful and unique space that reflects your style.

    FAQ: Mixing Oak and White Trim

    Can you mix oak and white trim paint?

    Yes, you can mix oak and white trim paint. However, it’s important to consider the type of oak and the opacity of the white paint. Using a paint with higher opacity, such as Behr Premium Plus Ultra-Cover Stain Blocker, can help prevent the oak from showing through the white trim.

    Is oak a good choice for mixing with white trim?

    While oak can be mixed with white trim, it’s not always the best choice. Oak has natural tannins that can bleed through paint over time, potentially causing discoloration. If you choose to mix oak and white trim, consider using a high-quality primer to prevent this issue.

    Are there any alternatives to mixing oak and white trim?

    If you’re concerned about the potential issues with mixing oak and white trim, consider using a different type of wood or trim material. Maple, for example, is a hardwood that doesn’t have the same issues with tannins as oak.

    How can I ensure a seamless look when mixing oak and white trim?

    To ensure a seamless look when mixing oak and white trim, it’s important to properly prepare the oak trim before painting. This may include sanding the surface to remove any existing finish and applying a primer to prevent tannin bleed-through. Additionally, using a high-quality white paint with good opacity can help achieve a uniform finish.

    Can I mix stained and painted trim with oak?

    Yes, you can mix stained and painted trim with oak. This can create a unique and stylish look in your home. Just be sure to properly prepare the oak trim before painting to ensure a smooth and uniform finish.

  • Choosing the Right Paint Color for Your Walls

    Choosing the Right Paint Color for Your Walls

    Choosing the right paint color for your walls can be a daunting task. With all of the options available, it’s easy to become overwhelmed. However, with a few simple tips and tricks, you can learn how to make the best choice for painting walls at home

     This article will provide insights into understanding color schemes, determining the best hue for your space, and helping you create a unique atmosphere in any room.

    Wallpaper Installation

    Wallpaper installation is essential in choosing the right paint color for your walls. There are a few things to consider when installing wallpaper, such as the type of wallpaper material, how much adhesive you will need, and whether or not you can adequately prepare any existing walls. 

    Considering these considerations, you can choose the right paint color and achieve a clean finish with proper wallpaper installation.

    Paint Color Selection

    When it comes to home decor, paint color can play an essential role in setting the tone of a space. While there is no one-size-fits-all approach to selecting the ideal hue for your walls, some key considerations should be considered before you make your decision.

    In addition to psychological factors associated with different colors, consider practical concerns such as furniture placement and flooring materials when selecting a hue. 

    If most of the furnishings have cool undertones (like navy blues or grays), then warmer paint colors help balance the palette while creating cohesion throughout the space. Likewise, lighter shades will offer contrast against darker wood floors, while darker hues will look better with soft hardwoods.

    Room Lighting and Color

    The type of lighting in a room makes a significant difference when selecting the right paint color for your walls. 

    Natural sunlight is the best source, as it will not distort the colors you see on the paint swatch. Artificial lighting can be less reliable, as different types may change how a color looks in your space.

     For example, incandescent bulbs make colors appear warm and muted, while fluorescent lights make them appear brighter and more relaxed. Furthermore, certain paints have more reflective qualities that may give off a different appearance than they do on the swatch under specific lighting conditions.

    In addition to the type of lighting, the amount of light in a room should also be considered when selecting paint colors for your walls. 

    If there is limited or no natural light entering a room, then opt for lighter shades of paint which are better at reflecting artificial light and making spaces look brighter and more prominent. 

    Similarly, darker shades work well if plenty of natural light streams into a room since they will only wash away with a bit of brightness during peak daylight hours.

    Choosing a Color Palette

    When selecting a color palette for your walls, the possibilities are endless. It’s essential to consider the size and shape of the room, as well as its purpose. 

    Before you dive into color selection, consider how much light the space gets throughout the day. Natural light will affect how specific colors appear on your walls and help guide your choice of hues.

    Consider opting for bolder shades like blues or greens for open spaces with large windows with plenty of natural light.

     You might opt for a dramatic charcoal or deep plum hue if a darker shade is desired. For smaller rooms with little natural light, lighter shades such as pastels can make them more extensive and inviting. 

    Try combining two shades in one room to create depth and contrast – this will work exceptionally well if you have furniture pieces in multiple colors or patterns within the same space. 

    Feel free to experiment with multiple options until you find something that works best for your home!

    Accent Colors & Trim

    Accent colors and trim are essential elements of a room’s color palette, as they contrast the wall color. 

    When selecting accent colors, it’s essential to remember that you want your accent colors to complement the room’s overall look. This can be achieved by choosing a similar tone from the wall color but with a slightly different hue or depth. For example, if you have chosen light blue for your walls, try adding a navy or dark teal for your accent color. Similarly, if you select white walls, consider adding an off-white shade as an accent that will add subtle definition to the space.

    Trim is another excellent way to incorporate accent colors into your design scheme. You can use trim in various ways around doorways and windows or as frames around artwork and mirrors.

     Selecting coordinating paint shades for trim allows you to create visual interest without overwhelming the room’s overall look with too many bold colors.

     It’s also essential to ensure that any woodwork matches baseboards and crown moldings, so everything appears unified throughout the space.

    Decorating with Paint Colors

    When deciding which paint color to use on the walls of a room, it is essential to consider the atmosphere you are trying to create. 

    A light, soothing color can help create a calming and peaceful environment, while bright colors can energize and enliven a space. Neutral shades like white or beige work well in most rooms, making them appear larger and more radiant. 

    However, opt for bolder paint colors that reflect your style and taste to add personality to your space. Accent walls can also provide an exciting contrast with the primary wall color.

    Paint finishes are also essential when it comes to decorating with paint colors. Flat or matte finishes are usually best for walls as they tend not to reflect too much light, making them ideal for more muted tones.

     Satin or eggshell finishes work well in high-traffic areas such as kitchens and bathrooms, offering more excellent durability than other finishes while providing good adhesion properties with minimal sheen.

     For those looking for a higher shine finish, gloss paints offer the highest level of luster but require additional maintenance due to their susceptibility towards dirt buildup and fingerprints.

    Professional Tips & Advice

    When choosing the right paint color for your walls, consider the size of the room and surrounding furniture.

     Lighter colors make a small room appear bigger, whereas darker shades can create a cozy atmosphere in larger rooms.

     For an inviting kitchen, opt for warm hues such as yellow or orange to give it a homey feel. If you’re looking for something more professional and timeless, grey is always a safe choice.

    Sample swatches before painting the entire wall so you get an accurate idea of how your paint will look throughout the day with changing light levels. Choose finishes like eggshell or satin for easier cleaning and maintainability. 

    Finally, consider window treatments and accents when selecting your paint color; they should all complement each other to achieve balance in any given space.

  • 5 Simple Tips for a Successful Room Painting

    5 Simple Tips for a Successful Room Painting

    Paint for Success

    Using the right supplies is essential for successful room painting. Start with a high-quality primer to ensure your paint will stick to the wall and last longer. Be sure to use a good-quality roller, brush, and painter’s tape when needed. Ensure you purchase enough of each type of material so you don’t run out mid-room and delay the job.

    Proper preparation is critical for success when it comes to painting a room.

    This includes cleaning walls before you start painting, sanding any rough areas, patching holes or cracks in the wall, removing outlet covers and light switch plates, taping off any trim or moldings around windows and doors, using drop cloths to protect floors from paint splatters and spills, etc. All these steps before starting can make your job more accessible in the long run!

    Lastly, be sure to select the right color for your space.

    You want something that will complement your furniture and décor without overpowering everything else in the room. If you’re unsure what color would look best in your space, consider testing samples on different walls before making a decision – this will help ensure you’ll be happy with your choice once everything is complete!

    Tip 1: Prep the Room

    Before you even open a can of paint, it is essential to take the time to prepare the room for painting properly. This includes gathering all the necessary materials and tools, assessing any potential issues that need to be addressed before beginning, and protecting any furniture and items in the room from splatters.

    Start by clearing out all furniture and decorations from the walls or ceiling that will be painted. Depending on your available space, this might mean moving things into other rooms or temporarily packing them away in boxes.

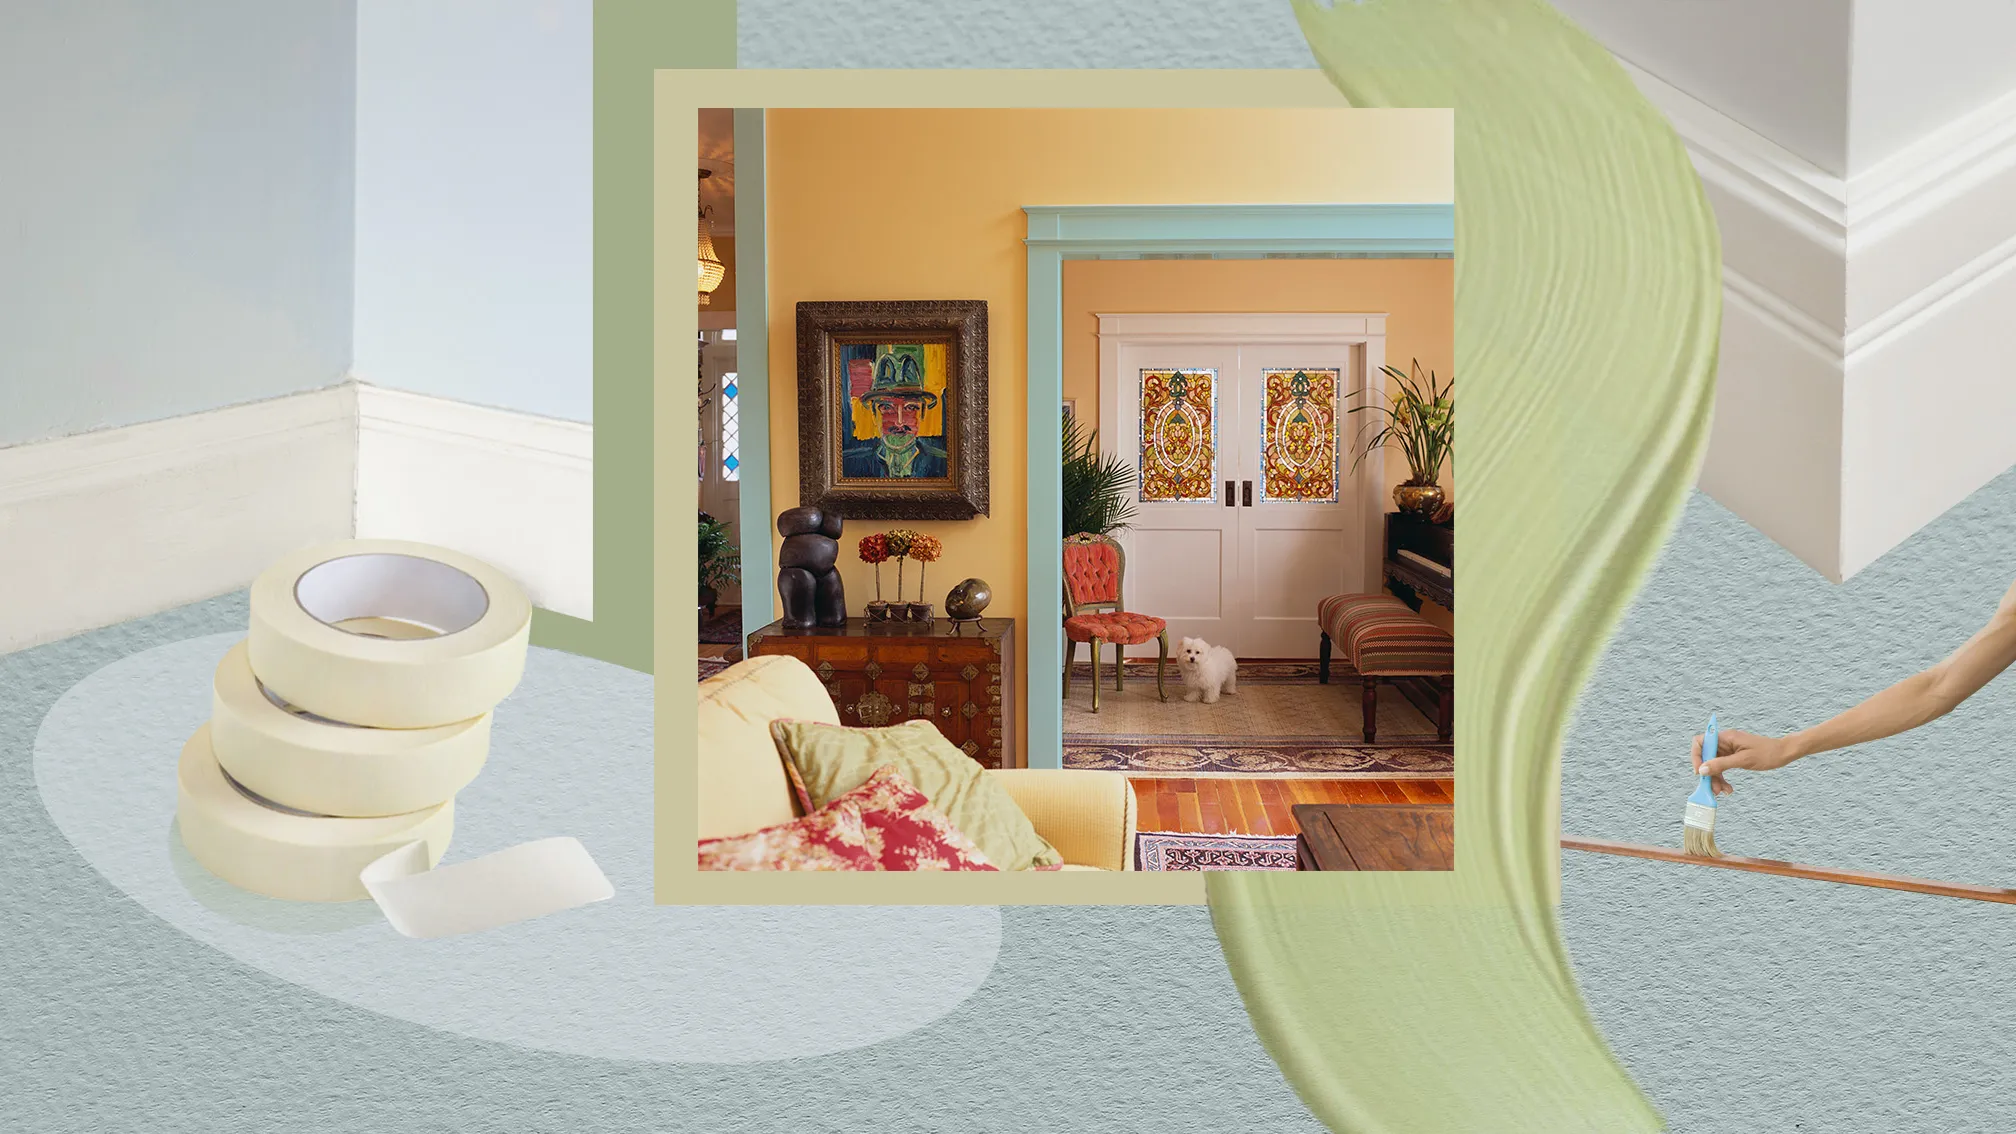
    Once everything has been cleared out, thoroughly clean the surfaces with soap and water to remove any dirt or grime that might affect how well the paint adheres. Fill in any cracks or holes with spackling paste and use painter’s tape on trim pieces like door frames or crown molding, so you don’t get paint where it doesn’t belong.

    Lastly, lay down drop cloths to protect your floors while painting.

    Tip 2: Choose Paint Color

    When painting a room, choosing the right color is essential. It’s crucial to pick a color that complements the furniture and overall aesthetic of the room. Here are some tips for finding the perfect paint color:

    First, consider the atmosphere you want to create. If you’re looking for a calming space, opt for muted tones such as blues and greens. For an energizing ambiance, try bold hues like reds and yellows. Don’t be afraid to experiment with different shades and tints – they could be your favorite!

    Second, look at materials in your current décor – wood floors or furniture – to find complementary tones or accent colors. Also, take into account any existing fabric patterns or artwork that will be in the room. You don’t want all these elements fighting for attention; instead, create harmony by selecting a hue that ties them together nicely.

    Lastly, test out swatches before committing to an entire wall of paint – this way, you can see how different lighting affects it throughout the day, and make sure it works with other elements of your design scheme before diving in head-first!

    Tip 3: Gather Supplies

    Before you begin painting, you must have all the necessary supplies. Otherwise, you may run back and forth between stores throughout the task. To help ensure a successful painting project, here are some tips for gathering supplies:

    First, make sure that you understand what type of paint is best suited for your room. You can usually get this information from a local hardware store or home improvement center. Depending on whether your walls are already painted or need priming, different types of paint may be required.

    Once you know which type is right for your project, buy enough to cover the entire area, plus an extra gallon in case of any mistakes.

    In addition to paint, other items such as brushes and rollers should also be purchased before starting the job. Have several different sizes on hand so that they can be used depending on how large or small an area needs covering.

    Along with these tools, it’s essential to have drop cloths available to protect furniture and floors from getting splattered with paint during application. Masking tape will also come in handy when protecting trim from being painted over by mistake. Finally, having a ladder around will provide easy access to high areas and corners when painting them off of the ground-level surface.

    Tip 4: Use Primer

    Priming is essential for achieving a professional, polished look. Primer helps ensure that your paint goes on evenly and smoothly, creates better adhesion to the walls, and prevents existing stains from showing through. It also seals the wall’s surface so paint won’t be absorbed unevenly.

    Even if you’re painting over an existing color, primer is best to even out the texture and avoid having two different colors show through. If you are dealing with glossy surfaces or new drywall, a primer will help create a uniform consistency before applying your final coat of paint.

    Additionally, specific primers can block mildew spores and seal in odors or smoke damage, so you don’t have lingering smells or discolorations after painting your room. When selecting a primer, make sure it is specifically designed for interior use on walls and ceilings, as exterior primers may contain too harsh chemicals for indoor use.

    Tip 5: Paint with Technique

    Painting a room is much more than just rolling paint on the walls. Adding texture and technique to your painting can take your look to the next level. A straightforward way to do this is by using a sponge or rag while painting. Start with one color as the base coat, then dip a sponge into another color and dab it onto your wall in random patterns.

    Not only will this add an interesting effect to your walls, but it will also help hide any imperfections on them simultaneously.

    Another way to add texture and interest to paint is by dragging it on. To do this, pour two contrasting colors of paint onto a paper plate or drop cloth, then use a cheesecloth or rag to pick up both paints and gently press them against the wall in a circular motion.

    This creates an intricate marbled pattern that looks great for accent walls or other focus areas throughout your home. Experimenting with different techniques can be fun, so don’t hesitate if you want to try something new and unique!

    Conclusion: Enjoy the New Look

    The conclusion of your room painting project can be the most satisfying part. Once you’ve finished, you can take a step back and admire your new look. It’s the perfect opportunity to appreciate the hard work that went into it and find joy in what you have achieved.

    After all, there is no better way to make a space feel brand new than with a fresh coat of paint.

    If any issues have arisen during the painting process, don’t be too hard on yourself — everyone makes mistakes! Instead, focus on finding the best solutions for you and your home. Keep up with regular maintenance, like dusting or wiping down surfaces as needed, so your walls look their best.

    All that matters is that you are happy with how everything turned out and proud of your accomplishments. Enjoy your new look!
  • What Factors Affect Paint Weight

    What Factors Affect Paint Weight

    If you are about to start your next paint job, or perhaps about to finish the one you started. 

    Now, you don’t know how much paint you need. 

    To find out how much paint you need, you first need to find out about the factors that affect paint weight.

    There are many things that affect the paint’s weight, such as the density and the pigments and binders inside the paint. 

    In this blog, we will talk more in detail about what factors affect paint weight and what are the standard measurements.

    Find out how big is a quart of paint 

    What factors affect paint weight?

    Paint weight is affected by a number of factors, including the type of paint, the pigments used, the density of the paint, and the amount of solvent used. 

    The type of paint can have a big impact on the weight of the paint, as oil-based paints tend to be much heavier than water-based paints. 

    The pigments used in the paint can also affect its weight, as some pigments are much heavier than others. 

    The density of the paint also plays a role in its weight, as a more densely-packed paint will be heavier than a less dense one. 

    Finally, the amount of solvent used in the paint can also affect its weight, as a paint with a lot of solvent will be lighter than one with less solvent.

    Standard Measurements

    There are generally two types of paint measurements- standard and metric. Standard measurements are typically used in the United States, while metric measurements are used in most other countries. When buying paint, it is important to know which type of measurements your country uses so that you can buy the right amount.

    A gallon of paint generally covers around 350 square feet, but this can vary depending on the type of paint and the brand. A quart of paint generally covers around 100 square feet. These are just general estimates- always check the specific paint can for more exact measurements.

    When using standard measurements, it is important to remember that a pint is not the same as a pound- a pint is a unit of measurement for volume, while a pound is a unit of measurement for weight. This can be confusing when trying to figure out how much paint to buy. For example, if a can of paint says it is one pint, that does not mean it weighs one pound.

    To convert between standard and metric measurements, there are a few simple conversion formulas. One gallon is equal to 3.785 liters, one quart is equal to 0.946 liters, and one pint is equal to 0.473 liters. To convert from liters to gallons, multiply the number of liters by 0.264. To convert from liters to quarts, multiply the number of liters by 1.057. To convert from liters to pints, multiply the number of liters by 2.113.

    Using the proper measurements is essential when buying paint so that you don’t end up with too much or too little. With a little bit of knowledge, you can easily figure out the right amount to buy no matter what type of measurements your country uses.

    Can you estimate the weight of your paint by volume?

    There are a few ways to estimate the weight of your paint by volume. 

    The first way is to simply multiply the volume of paint by the density of the paint. 

    This will give you a good estimate of the weight of the paint. 

    Another way to estimate the weight of your paint is to weigh a known volume of paint and then divide that by the weight. 

    This will give you an estimate of the weight of your paint per unit volume.

    How to convert From Gallons to Pounds for Paint?

    To convert from gallons to pounds, you will need to know the weight of the paint you are using. 

    For example, if you are using a paint that weighs 10 pounds per gallon, and you have 2 gallons of paint, the weight would be 20 pounds.

    Does color of the paint affect its weight 

    The color of paint does not affect its weight. However, the type of paint does affect the weight. For example, water-based paint is much lighter than oil-based paint.

    Does dark paint weigh more?

    The short answer to this question is no, dark paint does not weigh more than light paint. However, there are some factors to consider when it comes to the weight of paint. 

    For example, if you are comparing two gallons of paint, one gallon of light paint and one gallon of dark paint, the dark paint will actually weigh more. 

    This is because darker colors require more pigment to achieve the desired color, and pigment is one of the heaviest ingredients in paint. 

    So, while a gallon of dark paint may weigh more than a gallon of light paint, the difference in weight is due to the pigment, not the color.

    Our Verdict

    It is important to pick the right paint for your project to ensure that the job gets done correctly. It is also important to remember that paint can be heavy, and it is best to pick a lighter color or to use a special finishing technique. 
    If you have any questions about this blog post, don’t hesitate to comment or ask question from me on Quora

  • Different House Paint Finishes

    Different House Paint Finishes

    Today, a wide variety of paint finishes are available. Others of them are semi-glossy, some are glossy, and some are matte. Every kind has benefits and drawbacks. Knowing what sort of finish you want pays off if you want the greatest outcome from your paint job.

    What to Take Into Account When Selecting a Paint Finish

    The two most common paint finishes are glossy and matte. Low-gloss matte paints have a tendency to seem flat. High-gloss glossy paints have a shiny look. Both methods have advantages, but picking the incorrect finish may lead to a less appealing finished product.

    The type of surface you want to cover, the quantity of light exposure, and the intended impact are just a few of the variables that must be taken into account when selecting the correct paint finish. For interior applications, matte finishes are popular because they offer a uniform, smooth look. Gloss coatings, on the other hand, are better suited for outdoor applications where glare is an issue.

    Different Paint Finishes

    Finishes on paint are crucial because they give a room personality. They aid in shielding the wall from moisture and mildew, as well. There are several paint finishes, including eggshell, satin, metallic, semi-gloss, and matte.

    High-Gloss Surface

    What distinguishes a high gloss paint finish from standard paint? Furniture, kitchen cabinets, bathroom vanities, mirrors, and other home furnishings frequently have high gloss surfaces. They come in a variety of hues and designs and give your house an opulent appearance. High gloss surfaces have a glossy shine that reflects light and makes things look lighter. Additionally, this kind of paint offers higher defence against scuffs and stains.

    Semi-Gloss Surface

    What is a semi-gloss paint finish, exactly? Is it matte or glossy? How does it appear? Semi-Gloss paints are one kind of paint that resemble high gloss paint finishes in terms of shine. They are sometimes referred to as pearl or satin finishes. The quantity of light reflection that these two paint finishes emit is what distinguishes them most from one another. A semi-gloss paint finish emits a subtle sheen, making it perfect for interior areas like bathrooms and kitchens. Because it contrasts so well with wooden surfaces, this paint finish is frequently selected.

    Satin Surface

    Increasingly popular because they look fantastic and last longer are satin paint finishes. They also come in a variety of hues and designs. What distinguishes them? A type of lacquer finish with a satin or matte look called satin paints. They are frequently used on top of other finishes such acrylic, latex, polyurethane, and oil. A satin finish has a somewhat duller shine than a gloss finish, which is the major distinction between the two. For interior painting work where longevity is crucial, a satin finish is an excellent option. Additionally, compared to glossy finishes, matte finishes are simpler to clean.

    Finish in eggshell

    A semi-gloss or satin paint finish is an example of an eggshell paint finish. It has a matte look and is frequently applied to cabinets and furniture. Flat, glossy, semi-gloss, and high gloss are all types of flat paint finishes. They are typically used on ceilings and walls. Flat paint finishes require less preparation, making them simpler to use. The drawback is that after a while, they start to appear drab. Eggshell paints, on the other hand, have a softer finish and stay longer.

    Finish: Flat or Matte

    What distinguishes a matte finish from a flat paint finish? What are each’s benefits and drawbacks? Over a glossy surface like lacquer, varnish, shellac, polyurethane, etc., flat paints are often applied. They also go by the name “high gloss paints.” These paints are perfect for interior applications where a shining, brilliant appearance is desired. Usually, matte paints are used on non-glossy surfaces like oil, enamel, wax, lacquer, etc. They offer higher UV protection, which is why they are frequently used outside.

    Advice on Picking the Right Sheen

    It’s crucial to pick the ideal colour sheen for your home’s interior or exterior. The entire look and feel of your home are greatly influenced by the colour sheen. Combining hue, value, and saturation creates colour sheen. Value, or how bright or dark a colour is, is referred to as the hue, while saturation, or how intense a colour is, is referred to as the saturation.

  • How to Decorate Nursery Walls Without Painting

    How to Decorate Nursery Walls Without Painting

    Painting is perhaps the most correct and optimal solution for children’s room walls. Here are a few points on How to Decorate Nursery Walls Without Painting:

    Painted walls are not afraid of felt-tip pens and prints of dirty palms after eating. In most cases, all traces of vandalism can either be washed off (for example, with nail polish remover) or painted over with a new coat of paint of the same shade. Having painted the walls, you can forget about their repair until the child graduates from school, which cannot be said about the wallpaper, which begins to peel off and lose color over time. 

    Wallpapers always have visible seams between the canvases, which somewhat spoil the general appearance of the walls and are a weak point – it is at the joints that the coating begins to peel off or be damaged. Painted walls do not have this problem and always look neat. 

    Walls painted in one color will be the best background for all kinds of wall decor – posters, photographs, interior letters, etc.

    Having once well prepared the walls of the nursery for painting, in the future you can repaint them easily, quickly and as often as you want. For example, if you need to update the interior by age.

    Of course, painting has its drawbacks:

    Before you paint the nursery, you need to level all the partitions and bring them to a perfectly smooth state, which is tricky and expensive. Sometimes the walls are so crooked that it is impossible to align them. In this case, it is better to apply paint on wallpaper for painting, which, due to its relief, makes the curvature of the walls less noticeable and hides minor defects in the base. 

    Painted walls, unlike wallpapered ones, do not have any patterns or patterns. However, if desired, they can be decorated with vinyl stickers or painted with acrylic paints.

    From this material, you will learn how to paint the walls in the nursery, choose the color and type of paint, and get design ideas from a selection of photos of children’s rooms.

    What color to paint the children’s room?

    As you know, color sets the mood not only for the room but also for your child’s emotional state. Therefore, when choosing colors for a nursery, in addition to its size and illumination, one should also consider the character, age, and gender of the room owner. Here are some ideas and tips to help you decide what color to paint your child’s room:

    The age of the child must be taken into account. 

    In a newborn’s bedroom, pastel and soothing shades are appropriate: cream, pale blue, powdery pink, light lilac, pale green. These delicate colors will not interfere with your baby’s sleep.

    For kids aged 2 to 7 years, you can choose more saturated colors – green, orange, yellow, pink, blue, and even red.

    But for children who have reached school age, calm shades of green, blue, blue, or turquoise will help focus on classes. 

    The walls of the teenage room can be painted either in one of the neutral “adult” colors (light gray, gray-blue, olive, beige, brown, etc.) or choose bold, bright, or very dark shades. For example, it can be black and white walls with pink accents in a girl’s room or orange accents in a boy’s room.

    At the same time, remember that some colors, even in diluted form, can significantly affect the activity and mood of the child. So, for example, even a pale shade of yellow on the walls will act as a tonic. Therefore, when choosing paint for a nursery, it is important to consider the child’s nature. For active and mobile children, it is worth choosing soothing colors: green, beige, pink, blue, turquoise, blue, gray, brown, lilac, white. If the child lacks mobility, tone, and sociability, then his bedroom walls can be painted with invigorating shades: yellow, red, orange.

    Consider the room’s orientation to the cardinal points and the degree of its illumination in the daytime. So, in sunny southern and southwestern rooms, walls of cold shades will harmoniously look blue, gray-blue, turquoise, light gray. The walls of the northern bedroom with a lack of light are best decorated with warm and light colors: cream, beige, pale yellow, coral, pink, or lilac. In the south and north, soft white, light gray, and green colors will look good.

    To visually expand a small room, use light shades. If the room is tiny and dark, then it is most effective to use white at all, as in the interiors in the photo below.

    If you want to decorate the interior of a nursery for growth, then we recommend painting the walls with a neutral shade of paint: white, light gray, beige, gray-blue, pale green.

    It will be great if the owner of the room himself chooses what color to paint the children’s room. In order not to worry about the impracticality or excessive boldness of his decision, you can come to a compromise by offering the child a choice from the palette that you would approve.

  • Why do You Need Painting Services?

    Why do You Need Painting Services?

    Painting is a fascinating subject because it straddles the line between utilitarian need and artistic appeal. Landlords will need to repaint their buildings at some time, but there are numerous misconceptions about when that should happen.

    (more…)
  • How Do Make Painted Walls More Interesting? 5 Simple Ideas

    How Do Make Painted Walls More Interesting? 5 Simple Ideas

    Plain painted walls are good on their own, but they can be decorated more originally if desired. Here are a few ideas to keep in mind.

    Idea 1: Painting with acrylic paints

    Wall painting is especially relevant for a thematic nursery interior, for example, in a marine or fairy-tale style. Drawing can be both complex and detailed and simple and uncomplicated. Large compositions are best placed on only one wall, while small prints can be distributed in several places in the room at once, for example, above the bed, and in the play area. And one more piece of advice – if the room is small and there are enough bright objects in it, then large and bright drawings will only reduce the space and overload the interior. Read more tips, decor ideas, as well as step-by-step instructions for painting walls with your own hands in this article.

    Idea 2. Highlighting the accent wall with color

    If you want the child’s room to be bright, but you are afraid to overdo it, paint only one wall or part of the wall with colored paint, and neutrally decorate all other partitions. So you make the interior stylish without overloading it. In addition, in this way, you can zone the space, visually separating, say, a sleeping or play area from a work area.

    Idea 3. Creating an optical illusion

    If the room is small, narrow, or has low ceilings, you can correct these shortcomings by decorating the walls with stripes or diamonds.

    • A vertical strip visually increases the height of the ceiling but somewhat narrows the room:
    • Rhombuses also visually stretch the walls up, and they can safely decorate all the walls in the room.
    • A horizontal strip, on the contrary, can slightly lower the level of the ceiling, but it will visually expand a narrow room. This technique is best used on only one accent wall.

    Idea 4. Vinyl stickers

    With their help, you can easily, quickly, and inexpensively transform plain walls and the interior as a whole. In the last couple of years, black and gold stickers in the form of circles, triangles, clouds, raindrops, stars, and hearts have not gone out of fashion.

    If you like this way of decor, we suggest you learn more about it from our article: Interior stickers in a children’s room design.

    Idea 5. Combination of painted walls with wallpaper or photo wallpaper

    Not sure which is better – paint the walls or wallpaper them? Or maybe both? By sticking beautiful and colorful wallpaper or photo wallpaper on one wall and just painting the rest of the walls, you will only benefit from a compromise – make the interior stylish and save on wallpaper.

    How can you paint the walls in the children’s room?

    The walls in the child’s bedroom need to be covered with paint, which is intended specifically for decorating children’s rooms and has special characteristics:

    • Water-resistance; 
    • Hypoallergenic; 
    • breathability; 
    • Abrasion resistance; 
    • Thixotropy (for ease of application); 
    • The economy in price and consumption.

    How can you decorate a nursery? 

    Wallcoverings that meet all of the above characteristics are sold in the following types:

    1. Water-dispersion paint or just water-based paint – dries quickly, is breathable, does not smell, is easy to clean, and inexpensive. 
    2. Acrylic paint has characteristics similar to water-dispersion paint, and in addition to all the pluses, the paint forms a high-strength matte surface when dried. 
    3. Silicone paint is the most modern material for painting walls, which has both vapor permeability and water resistance at the same time. 
    4. Latex paint – lays down well and holds firmly. The surface painted with this paint is very pleasant to the touch. 
    5. Ecological paints – paints with the most natural composition, even from their name, it is clear that they are the best suited for a nursery. Their only downside is the cost.

    And what paints can not paint the walls in the nursery? Oil and alkyd enamel paints are not suitable for children’s rooms because of the harsh smell and non-breathable surface.